A packaging job has more ways to fail than a flat print job, and most of them happen before the press runs. The box looks right on screen, the brand colours are perfect, the type is sharp — and then it reaches the converter and the artwork is sitting on the wrong dieline, the glue tab is covered in ink, the fold creases run straight through the logo, and a same-week launch slips by ten days while a new file is built.
This is a spec-level guide to packaging dieline design. Not "what makes a box look good" — that is a separate craft — but exactly what a print-ready packaging file contains: what a dieline is, where it comes from, how cut and crease lines differ, how much bleed a carton needs, and how to set up the file so the converter can run it without sending it back. If you run a product brand, a packaging business, or you brief designers and hand artwork to a carton printer, this is the checklist that keeps launches on schedule.
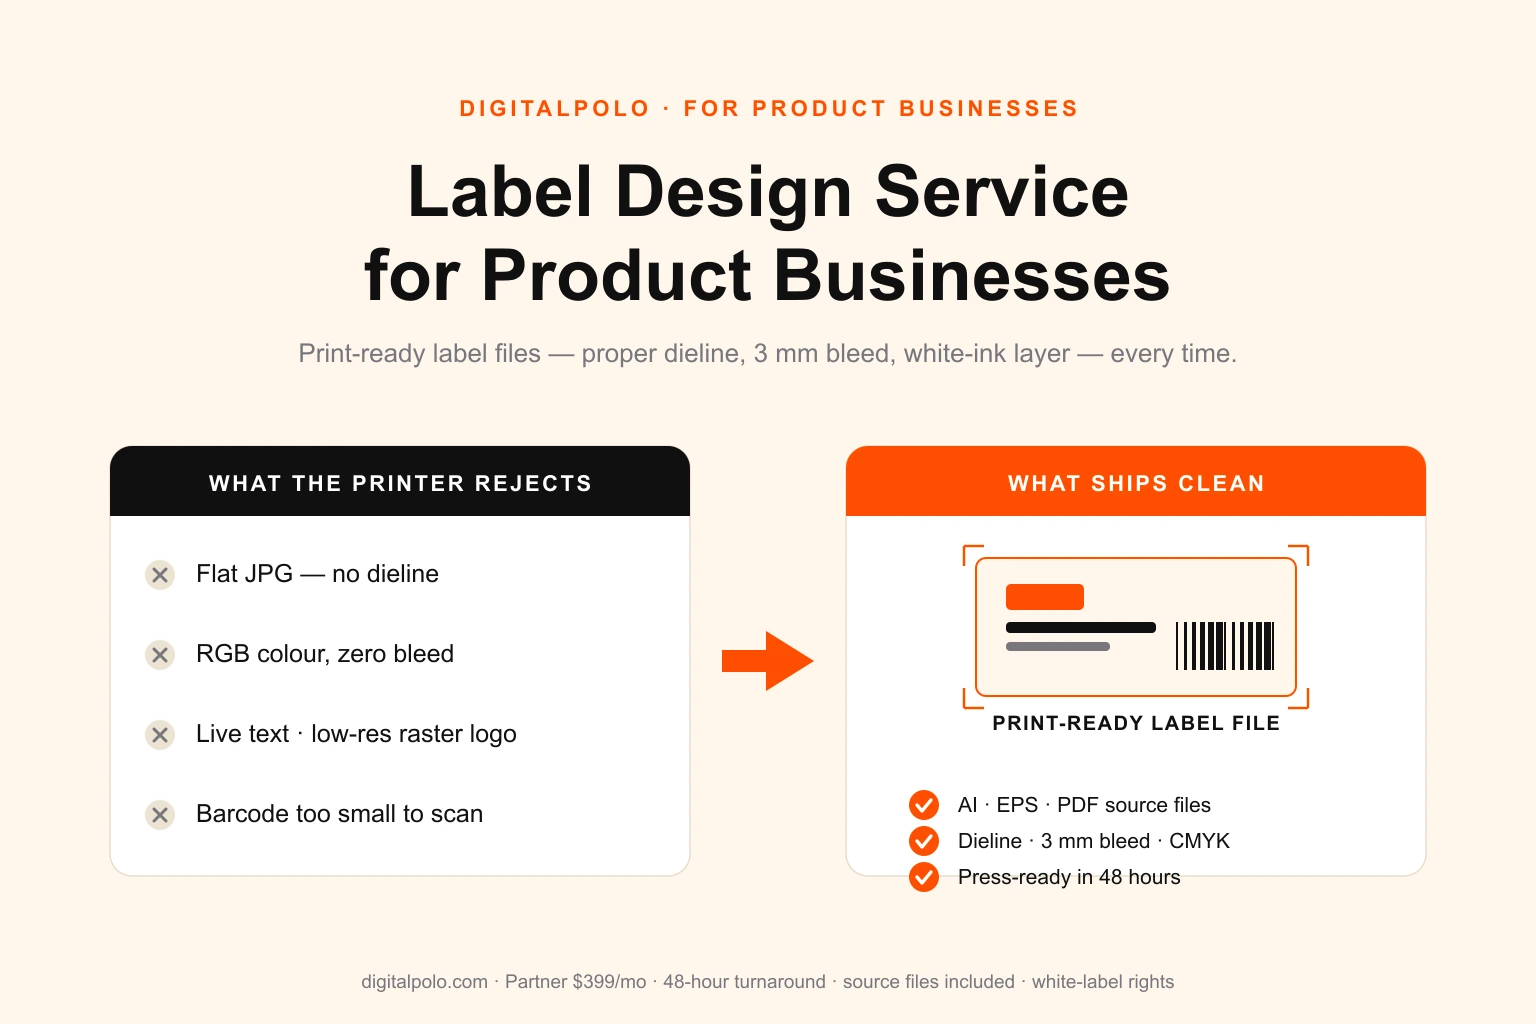
DigitalPolo has been delivering unlimited graphic design since 2010 — one of the oldest services in the category — with plans from $399/month, 48-hour turnaround, unlimited revisions, and print-ready vector source files (AI, EPS, PDF) built on a properly locked dieline included as standard. The label side of product packaging — wrap-around and front-and-back labels — is covered in our guide to label design service for product businesses; this article is the structural box itself, layer by layer.
What a Dieline Actually Is
A dieline is the flat, unfolded blueprint of a package. Take any folding carton apart at the glue seam and lay it flat: that two-dimensional shape — with every edge, every fold, every tab — is the dieline. It is a vector template, and it does two jobs at once.
First, it drives the cutting die — the physical tool, a shaped steel blade mounted in plywood, that the converter uses to stamp the board into shape. The die is built directly from the dieline geometry. Second, it tells the designer exactly where artwork can go: which areas are visible panels, which fold inward, which get glued, and where the box edges fall.
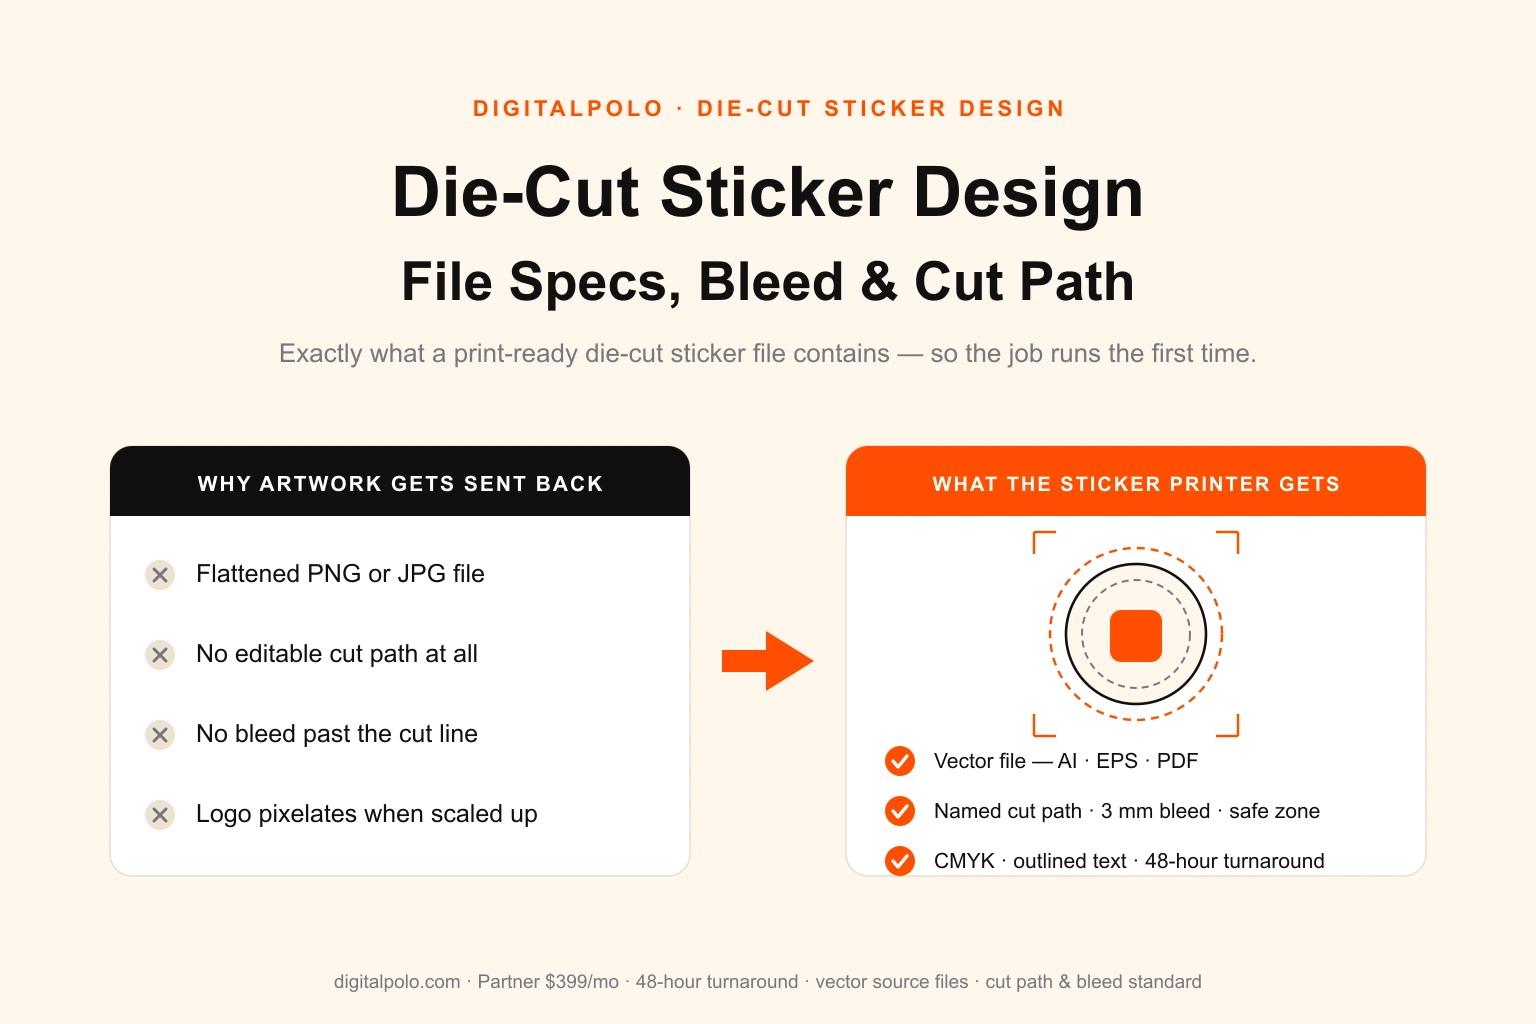
That second job is the one designers most often get wrong. A dieline is not decoration and it is not artwork. It is an instruction set. The artwork is placed onto the dieline; the dieline itself is never moved, scaled, or edited. Treat it the way a die-cut sticker file treats its cut path — a locked, separate layer that the artwork must respect but must never alter.
Where the Dieline Comes From
This is the single most important rule in packaging design, and the one that causes the most expensive mistakes: you do not invent the dieline. The manufacturer provides it.
A converter's dieline corresponds to a real cutting die — either one they already own or one they will tool for your job. If a designer builds artwork on a dieline pulled from a generic template library, or worse, draws one freehand, the artwork will not match the die that actually cuts the board. Panels will be the wrong size, creases will land in the wrong place, and the file is scrap.
So the correct sequence is always:
- Choose the converter first. Folding-carton printer, corrugated-mailer maker, rigid-box manufacturer, pouch converter — each has different capabilities and dies.
- Request the dieline from them. They will send a vector file, usually AI or PDF, with the die geometry already drawn.
- The designer places artwork on that supplied dieline. Nothing else.
If no dieline exists yet — a brand-new structural shape no one has tooled — a structural packaging designer creates the dieline first, often in dedicated software such as ArtiosCAD, and the graphic designer applies artwork only once that structure is locked. Structural design and graphic design are two distinct skills; do not assume one person covers both, and always confirm which you are asking for.
The Anatomy of a Print-Ready Dieline File
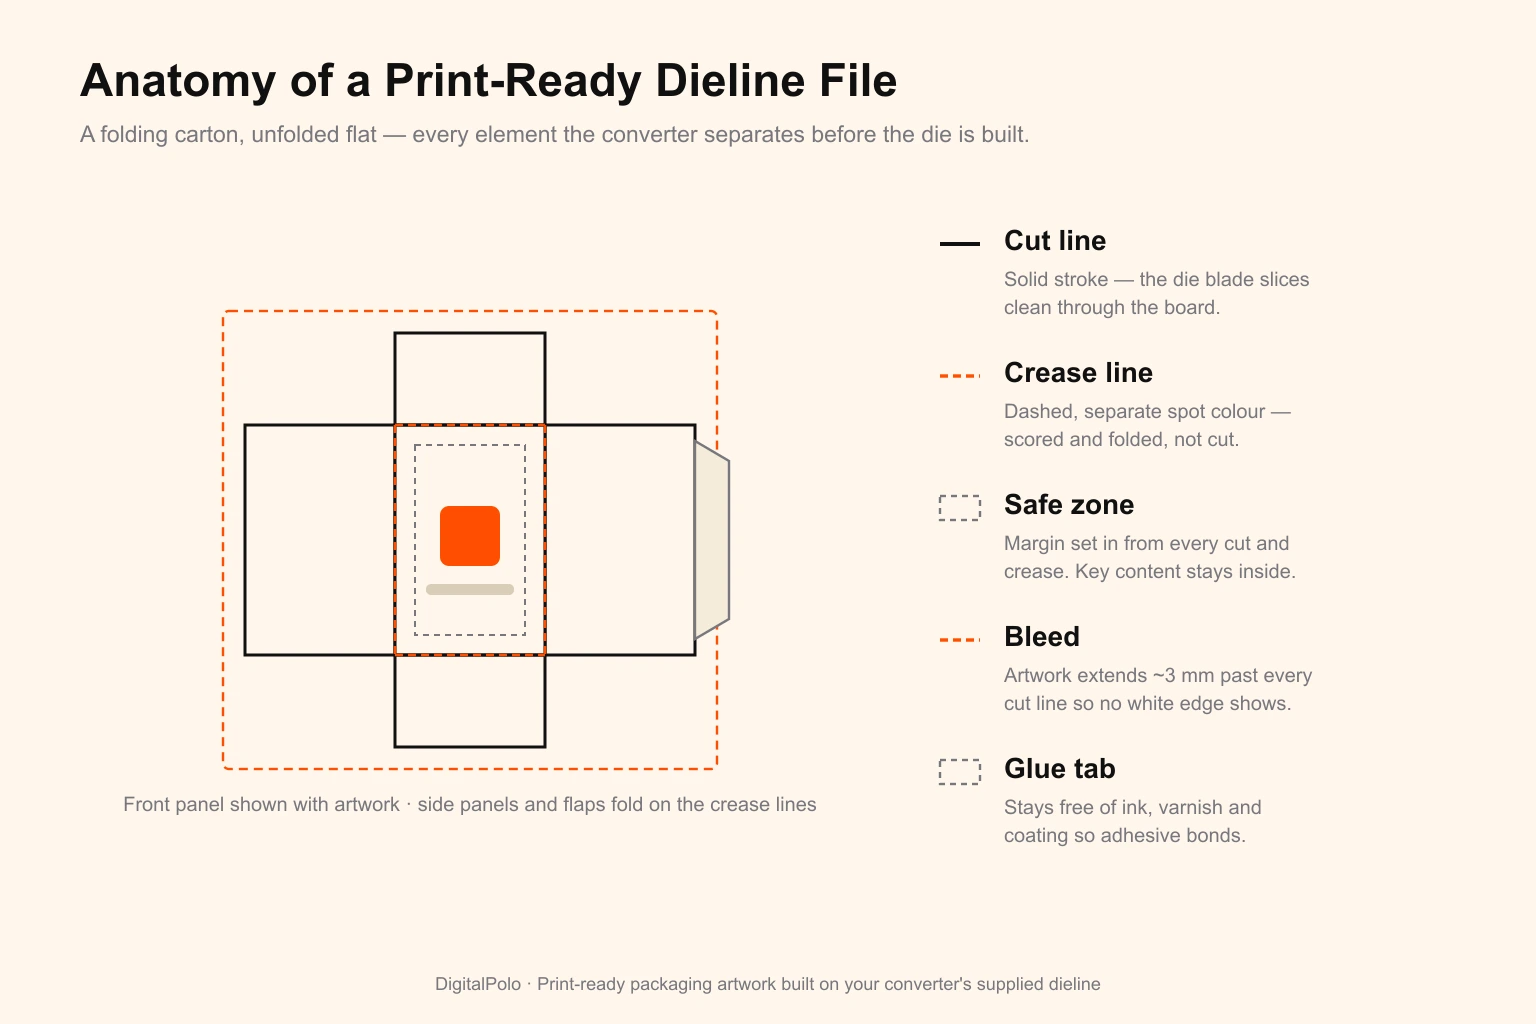
A correct packaging file has the dieline geometry separated into distinct, named elements. Get all of them right and the converter can run the job untouched.
Cut lines
The cut line is where the die blade slices clean through the board — the outer outline of the unfolded box, plus any internal cuts such as a product window, a hang-tab hole, or a tear strip. Cut lines are drawn as a single continuous stroke in a clearly named spot colour (commonly Cut or Die Cut), with a stroke and no fill.
Crease lines
The crease line — also called a score or fold line — is where the board is scored and bent, not cut. Every fold of the box is a crease. Crease lines live on the same dieline layer as cut lines but in a different named spot colour (commonly Crease, Fold, or Score), usually drawn dashed so a human can read the file at a glance. Cutting and creasing are two separate tooling operations on the press, so the two line types must be colour-separated or the die-maker cannot build the tool.
Glue tabs
Glue tabs are the flaps that get bonded to form the box. They are critical and routinely ruined: a glue tab must be kept free of ink, varnish, and especially any coating. Adhesive will not bond reliably to a printed or coated surface. The dieline shows where the tabs are; the designer's job is to make sure artwork and finishes stop short of them.
Bleed
Any artwork that runs to the edge of a panel must extend past the cut line into the bleed. Folding cartons typically need 3 mm of bleed on every cut edge. Corrugated and rigid-box work often needs more — 5 mm or above — because thicker, heavier board shifts more during die-cutting. Always confirm the bleed value with the converter; it is a per-job spec, not a universal one.
Safe zone
The safe zone is the inverse of bleed: a margin set in from every cut line and, just as importantly, in from every crease. Logos, legal copy, barcodes and key type stay inside it. Content that sits on a crease will literally be folded in half; content too close to a cut edge gets trimmed off when the die drifts. A 3–5 mm safe margin from cuts and creases absorbs the normal movement of board on a packaging press.
Panel awareness
Unlike a flat label, a box has panels that face different directions — front, back, sides, top, bottom, inner flaps. Artwork has to be oriented correctly per panel so the box reads right when folded. A back-panel design rotated 180 degrees is a classic dieline error: it looks fine on the flat file and appears upside down on the assembled box.
Layer Setup: How the File Should Be Built
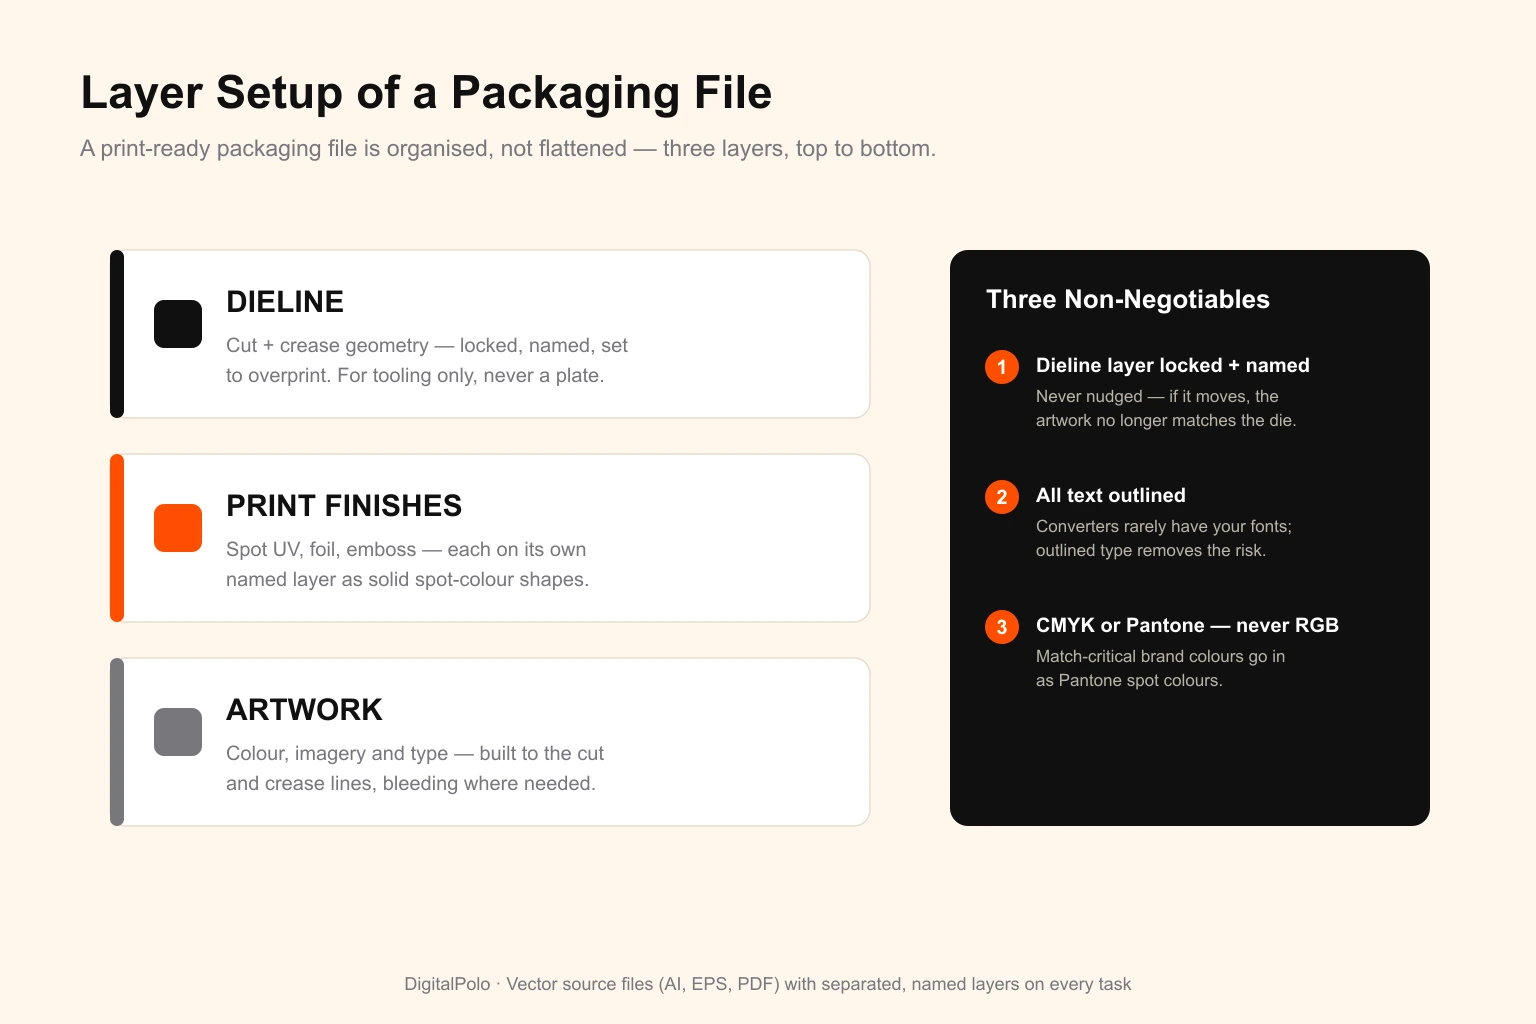
A print-ready packaging file is organised, not flattened. The standard layer stack, top to bottom:
- Dieline — cut and crease geometry, locked, set to overprint, never output as a printing plate. The converter uses it for tooling only.
- Print finishes — spot UV, foil stamping, emboss/deboss each on their own named layer, drawn as solid shapes in a spot colour. These drive separate tooling and plates, so they cannot be merged into the artwork.
- Artwork — the visible design: colour, imagery, type. Built to the cut and crease lines, bleeding where needed.
Three non-negotiables:
- The dieline layer is locked and clearly named. The designer should never nudge it. If it moves, the artwork no longer matches the physical die.
- All text is converted to outlines. Converters rarely have your fonts; outlined type removes the risk entirely.
- Colour is CMYK or Pantone, never RGB. Brand-critical colours — the ones that must match across every SKU — should be specified as Pantone spot colours, not process builds. If the box prints on a clear or metallic substrate, a white ink layer is also needed wherever opaque colour must sit; that, too, goes on its own named layer.
Common Reasons Packaging Artwork Gets Rejected
Converters send files back for a predictable set of reasons. Nearly all of them are layer-and-spec problems, not creative ones:
- Artwork built on a template dieline that does not match the converter's actual die.
- The dieline merged into the artwork so cut and crease lines would print as visible black lines on the box.
- Glue tabs covered in ink or coating.
- No bleed, or bleed below the converter's minimum.
- Important content sitting on a crease or inside the trim margin.
- RGB colour or unflagged spot colours that will not separate correctly.
- Live fonts instead of outlined type.
- A raster file — JPG, PNG, flattened TIFF — with no editable die geometry at all.
- Spot UV, foil or emboss baked into the artwork instead of sitting on their own layers.
How to Brief a Designer for Packaging
A clean packaging brief gives the designer six things, and the first one is non-negotiable:
- The dieline file from your converter. Without it, nothing else can start correctly.
- The package type and substrate — folding carton, corrugated mailer, rigid box, stand-up pouch — and the board or material it prints on.
- Bleed and safe-zone values as stated by the converter, not assumed.
- Brand colours as Pantone references, not hex codes, plus which ones are match-critical across SKUs.
- Print finishes — spot UV, foil, emboss, soft-touch — so the designer builds the right finish layers from the start.
- Mandatory content — barcodes, regulatory text, net weight, recycling marks — and where it must or must not appear.
A brief with those six pieces gets the file right on the first round and avoids the most expensive packaging error of all: a die that has already been tooled to artwork that has to change.
Who Should Outsource Packaging Dieline Design
Applying artwork to a dieline correctly is a repeatable, recurring task — which is exactly what a flat-fee design subscription is built for. It tends to fit:
- Product brands launching and refreshing SKUs — new flavours, sizes, seasonal editions, line extensions — every month.
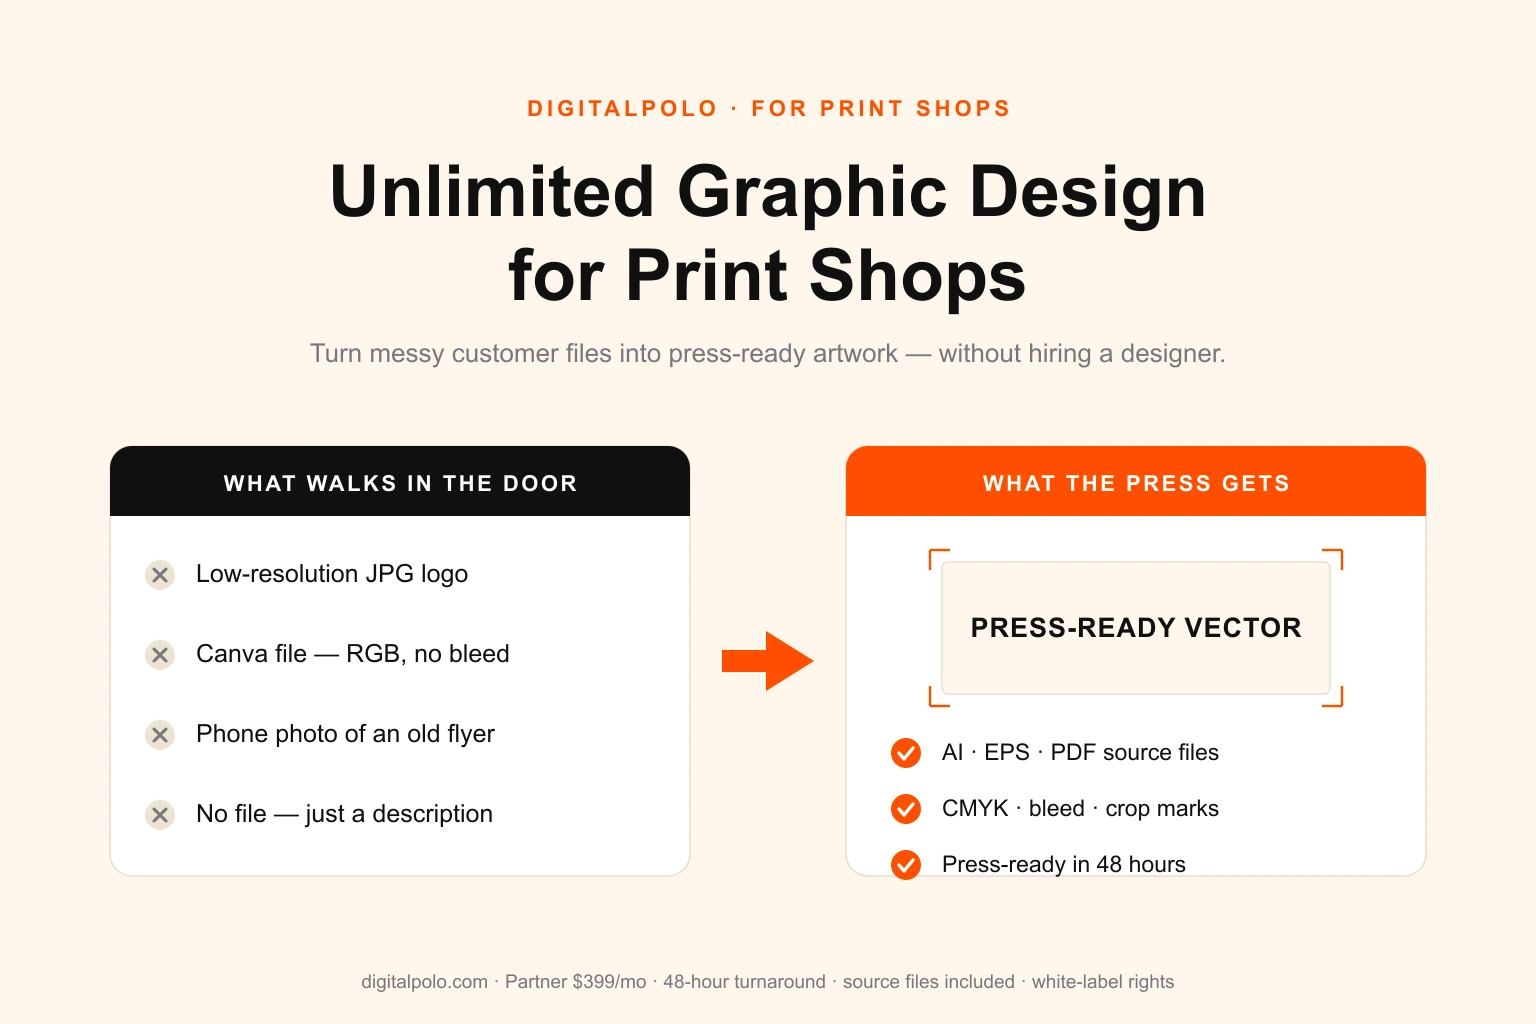
- Packaging and print businesses that need to absorb client artwork without staffing a full art department, much like any print shop handling client design work.
- E-commerce sellers moving from plain shippers to branded mailer boxes and inserts.
- Agencies and resellers producing packaging artwork for their own clients under their own brand.
Packaging volume is lumpy — quiet weeks, then a launch that needs eight cartons at once. A subscription absorbs that variance with no per-file charge, which a freelancer billed per project does not. The broader case for how flat-fee design replaces project billing is covered in how unlimited graphic design works.
DigitalPolo Plans and Pricing
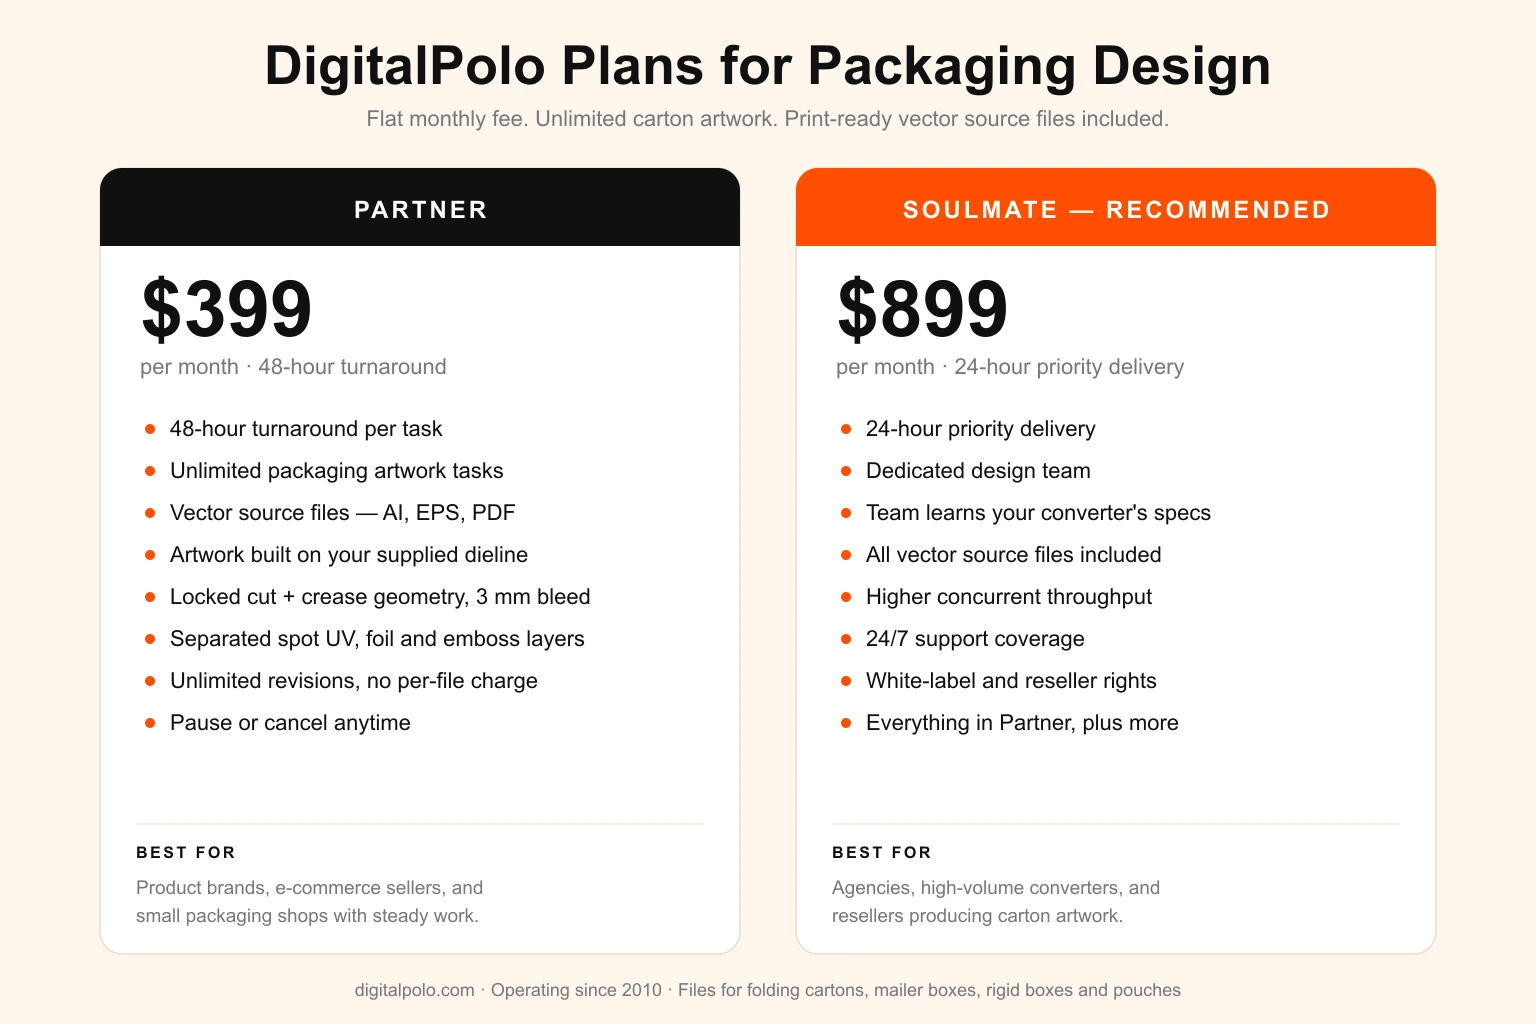
| Plan | Price | Turnaround | Delivery | Best For |
|---|---|---|---|---|
| Partner | $399/month | 48 hours | Unlimited tasks, all source files | Product brands, e-commerce sellers, small packaging shops |
| Soulmate | $899/month | 24 hours (priority) | Dedicated team, 24×7 support, all source files | Agencies, high-volume converters, resellers |
Both plans include delivery of all source files — vector formats (AI, EPS, PDF) suitable for print production, including folding cartons, corrugated mailer boxes, rigid boxes, pouches, sticker printing, signage and promotional product manufacturing.
Verdict: Get the Dieline Right and the Box Runs Itself
Packaging design fails at the file, not the concept. A box that looks flawless on screen still becomes scrap if the artwork sits on a template dieline, the glue tab is inked, or a crease runs through the logo. The fix is structural discipline: start from the converter's real dieline, keep it locked on its own layer, separate cut from crease, hold artwork inside the safe zone, and put every print finish on its own plate-ready layer.
That is the same discipline behind every print-ready file DigitalPolo delivers — for product brands shipping new SKUs, for packaging shops absorbing client work, and for agencies producing carton artwork under their own brand. Get the dieline handled correctly and a packaging launch stops being a gamble.
Frequently Asked Questions
What is a dieline in packaging design?
A dieline is a flat vector template that shows the unfolded shape of a package — every cut line, fold crease, glue tab and perforation laid out in two dimensions. The printer's cutting die is built from it, and the designer places artwork on top of it. It is the structural blueprint that turns flat board into a folded box.
Who provides the dieline — the printer or the designer?
In almost every case the packaging manufacturer or converter provides the dieline, because it is matched to a physical cutting die they already own or will tool. The designer works on top of that supplied dieline rather than inventing one. If no dieline exists yet, a structural designer creates it first, then the graphic designer applies artwork.
What file format does a packaging printer need?
Packaging printers need a vector file — AI, EPS or print-ready PDF — with the dieline kept on its own locked layer, artwork built to the cut and crease lines, all text converted to outlines, and CMYK or Pantone colour. Flat raster files such as JPG or PNG are rejected because they carry no editable die geometry and pixelate at print size.
How much bleed does packaging artwork need?
Most folding cartons need 3 mm of bleed past every cut line, and many corrugated or rigid-box converters ask for more — often 5 mm or above — because thicker board moves more during cutting. Any artwork that should run to the edge of a panel must extend into the bleed, and important content stays inside a safe zone set in from each cut and crease.
What is the difference between a cut line and a crease line on a dieline?
A cut line marks where the die blade slices the board, defining the outline and any windows or slots. A crease line marks where the board is scored and folded, not cut. They sit on the same dieline layer but in different named spot colours so the printer can separate them — cutting and creasing are two different tooling operations on the press.
Can an unlimited graphic design service design packaging artwork?
Yes. Packaging work is recurring and varied — new SKUs, seasonal editions and line extensions every month — which suits a flat-fee subscription well. A design service applies artwork to a supplied dieline, keeps the die geometry locked, separates print finishes onto their own layers, and delivers vector source files. DigitalPolo's Partner plan at $399/month covers unlimited packaging artwork with 48-hour turnaround.
Does DigitalPolo deliver print-ready packaging files?
Yes. DigitalPolo applies artwork to your supplied dieline, keeps the cut and crease geometry on a locked named layer, builds 3 mm or greater bleed, separates spot UV, foil and emboss onto their own layers, and delivers vector source files (AI, EPS, PDF) in CMYK or Pantone. Files ship in the formats folding-carton, mailer-box and pouch converters accept.
Need Print-Ready Packaging Files Without the Hiring Hassle?
DigitalPolo delivers vector source files (AI, EPS, PDF) with every task — built on your converter's dieline, with locked die geometry, correct bleed and separated finish layers, ready for folding cartons, mailer boxes, rigid boxes and pouches. Partner plan from $399/month. 48-hour turnaround.