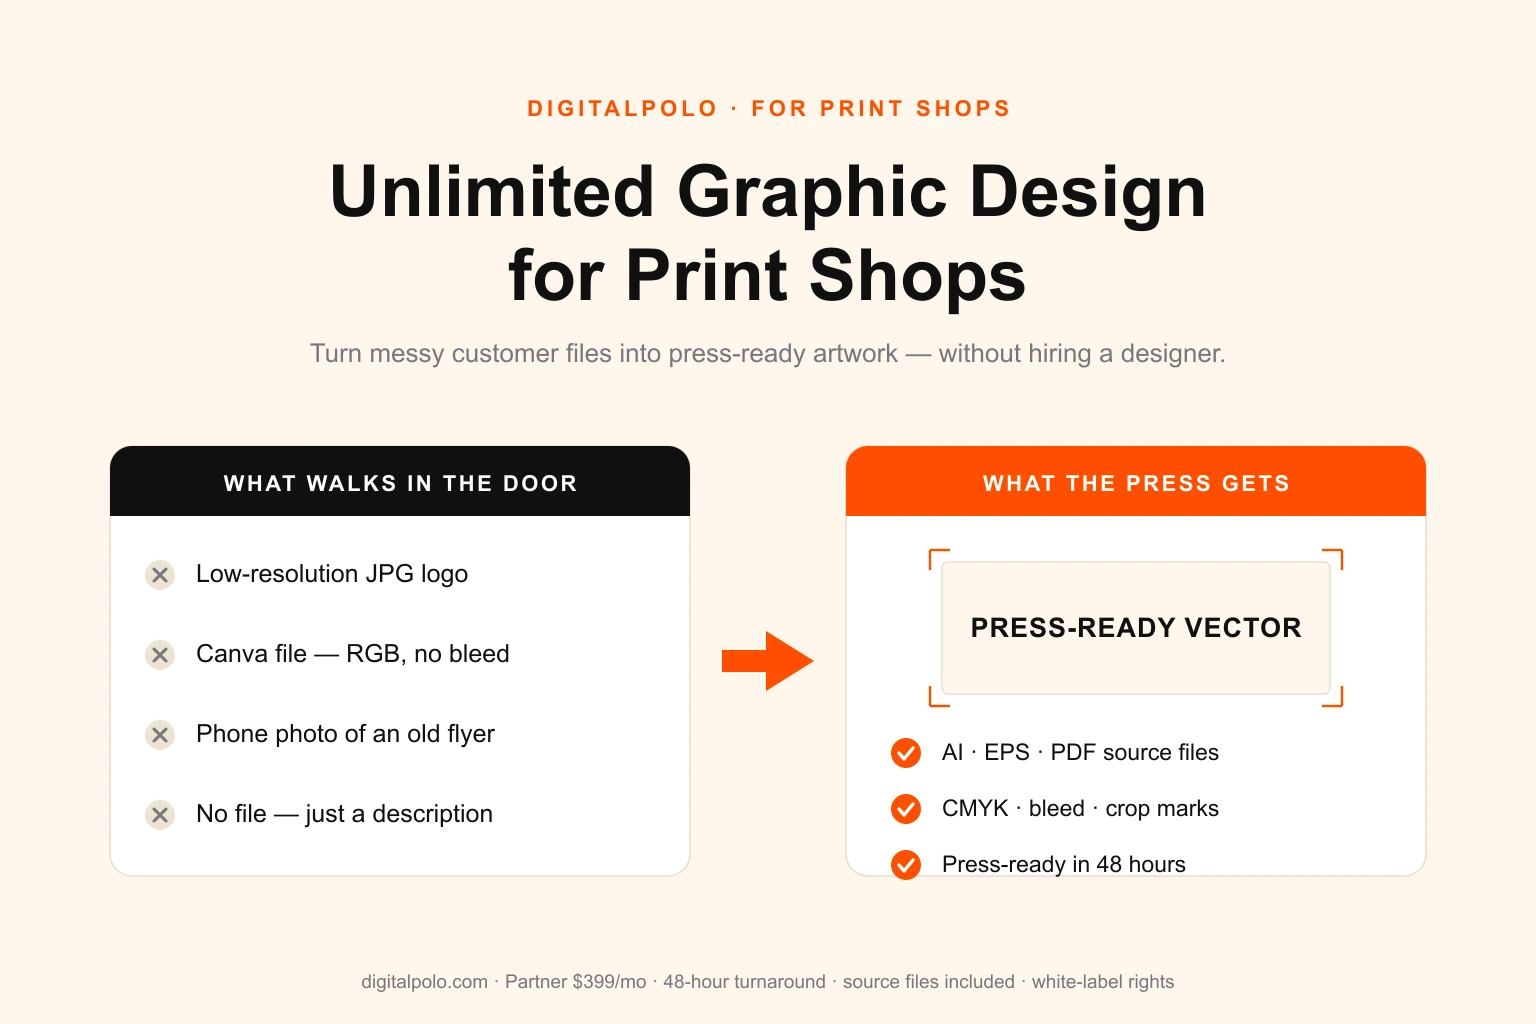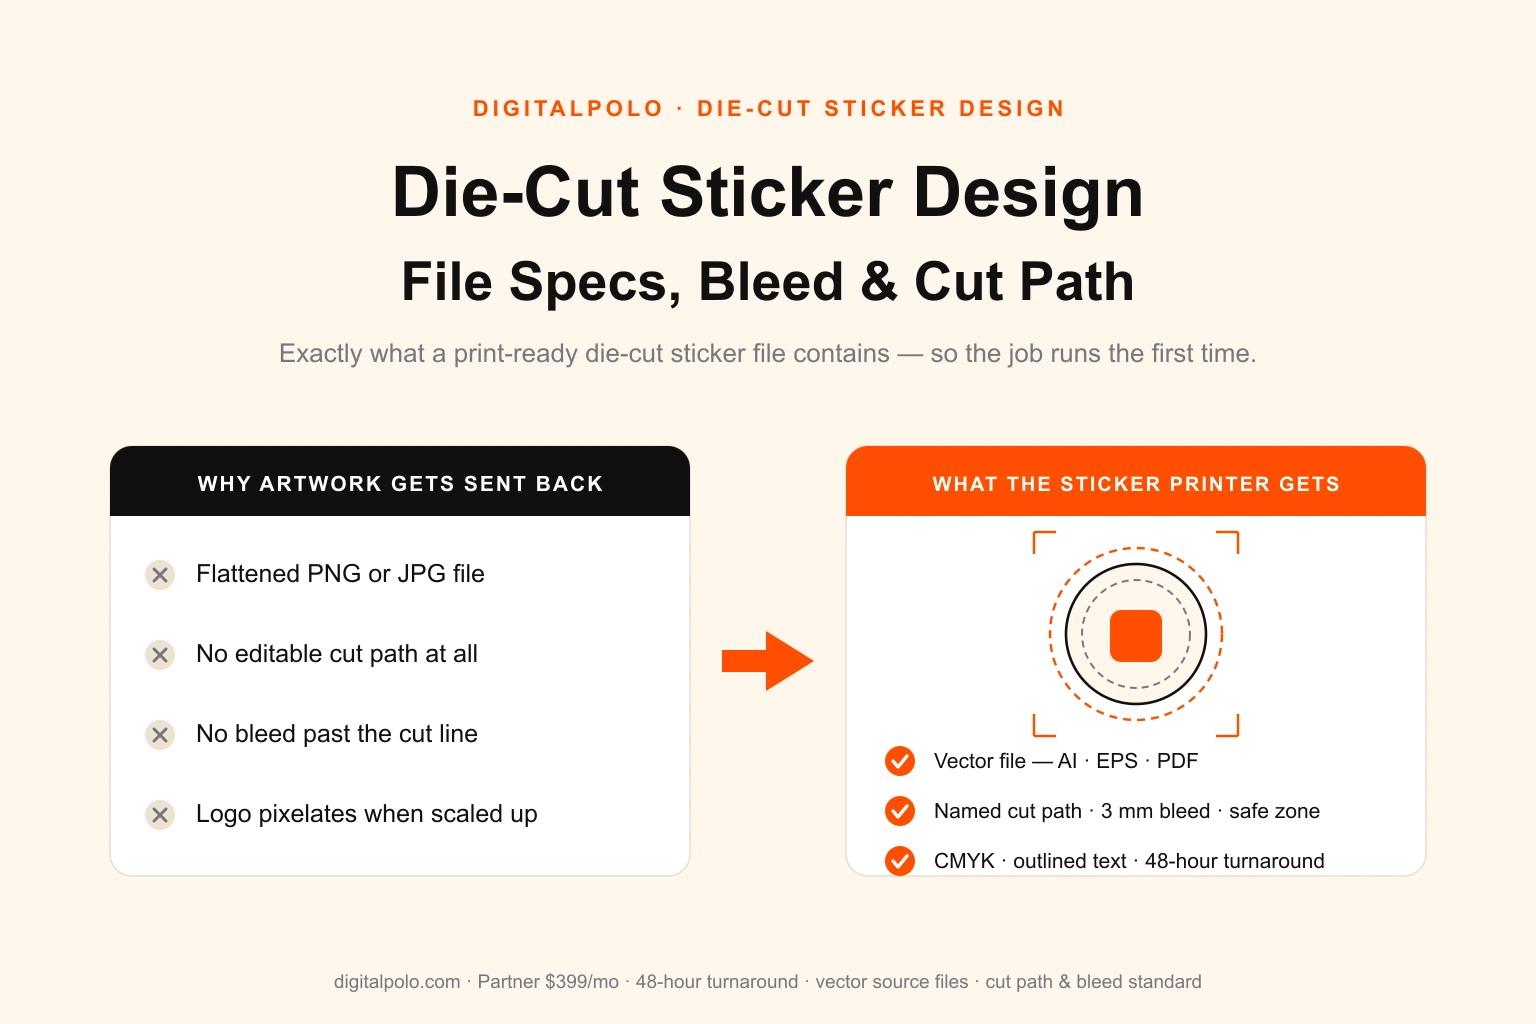
Every sticker order lives or dies on one file. The vinyl is in stock, the plotter is calibrated, the customer has paid — and then the artwork lands in the printer's inbox as a flattened PNG with no cut path, no bleed, and a logo that turns to mush the moment it is scaled to 3 inches. The job stalls, an email thread starts, and a same-day order quietly becomes a three-day order.
This is a spec-level guide to die-cut sticker design. Not "what makes a sticker look good" — that is a separate craft — but exactly what a print-ready die-cut file contains, where the cut path goes, how much bleed it needs, which formats a sticker printer actually accepts, and how kiss-cut changes the file. If you run a sticker business, brief designers, or hand artwork to a printer, this is the checklist that keeps jobs moving.
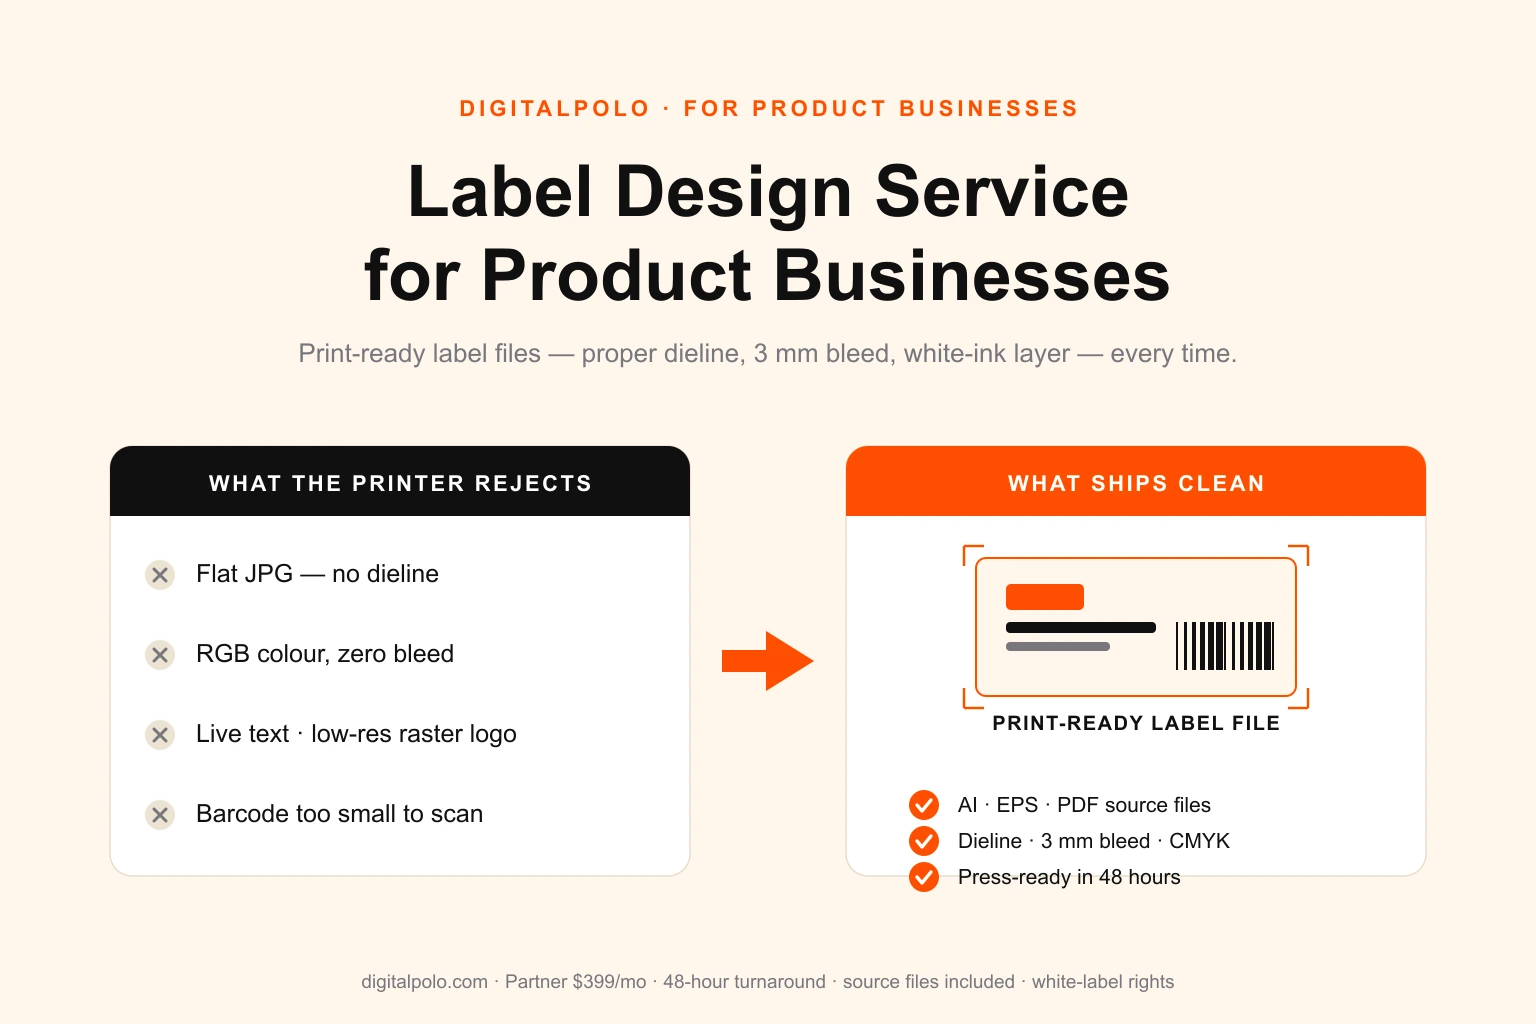
DigitalPolo has been delivering unlimited graphic design since 2010 — one of the oldest services in the category — with plans from $399/month, 48-hour turnaround, unlimited revisions, and print-ready vector source files (AI, EPS, PDF) built with a proper cut path and bleed included as standard. The buyer-side view of running design for a sticker brand is covered in our guide to graphic design for sticker businesses; this article is the file itself, layer by layer.
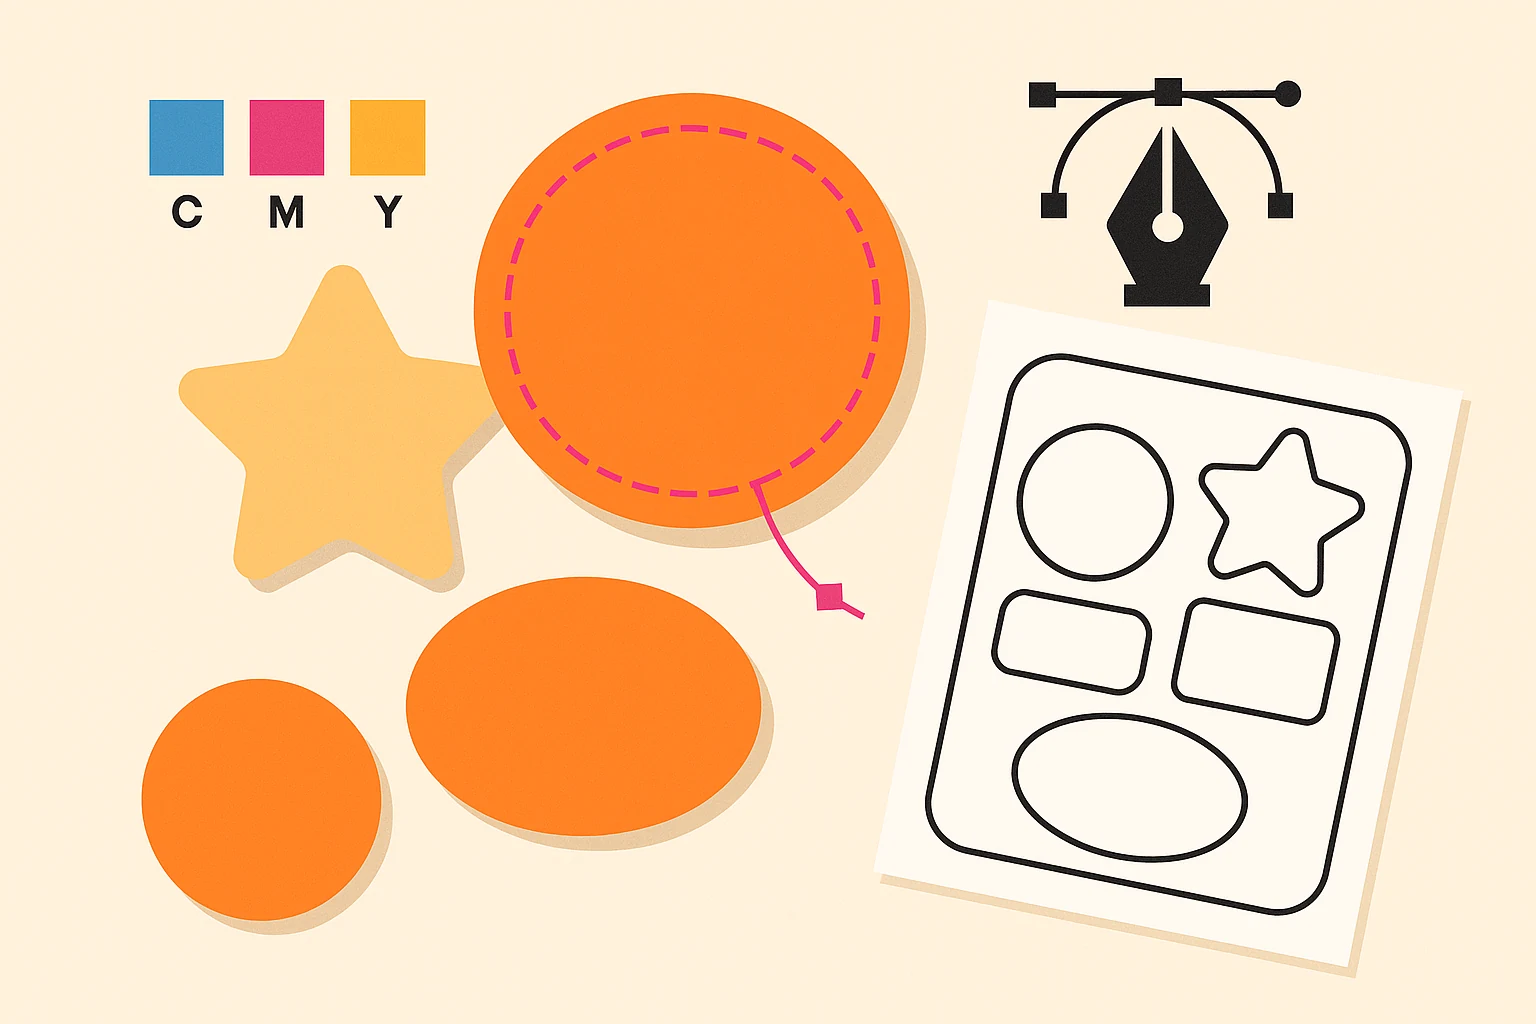
What "Die-Cut" Actually Means for the File
A die-cut sticker is cut to the shape of the artwork. There is no rectangular border, no white margin — the blade follows the outline of the design, whether that is a circle, a logo silhouette, or a jagged custom shape. That single fact drives every spec that follows.
Because the cut follows the art, the printer needs a precise instruction for where to cut. That instruction is a cut path: a vector outline, separate from the artwork, that the cutting plotter reads directly. A raster image — JPG, PNG, flattened TIFF — cannot carry an editable cut path. The printer would have to trace one by hand, guess at your intent, and bill you for it, or send the file back. This is the single most common reason die-cut sticker artwork gets rejected.
So die-cut work is, by definition, vector work. The artwork can contain raster elements inside it, but the file as delivered must be a vector file with a live, editable cut path.
The Anatomy of a Print-Ready Die-Cut Sticker File
A correct die-cut file has four distinct parts. Get all four right and the printer can run the job without touching it.
1. The artwork layer
The visible design — illustration, type, colour. It must be built or placed at the final printed size. A sticker designed at 3 × 3 inches should be a 3 × 3 inch artboard, not a tiny graphic the printer has to scale. Scaling guesswork is where colour shifts and blurred edges creep in.
2. The cut path
A single closed vector stroke that traces the outline the blade will follow. Best practice:
- It sits on its own named layer — commonly
CutContour,Cut, orDieline. - It is drawn as a spot colour (a named swatch, not a process build) so the plotter software can isolate it.
- It has a stroke and no fill — the path is an instruction, not a shape to be printed.
- It is one clean closed path, not a pile of overlapping segments. Two stray anchor points can send the blade somewhere unexpected.
For a die-cut sticker the cut path should also be slightly simpler than the raw artwork outline — gentle curves instead of sharp interior notches, because very tight angles tear vinyl and slow the plotter.
3. Bleed
Bleed is artwork that extends past the cut path — the standard is 3 mm (about 1/8 inch) on every side. No cutting machine is perfect; the blade drifts a fraction of a millimetre on every run. Bleed means that when it drifts outward, it is still slicing through your design and not through bare backing, so there is no thin white halo around the sticker.
4. The safe zone
The mirror of bleed. The safe zone sits 3 mm inside the cut path, and every element you cannot afford to lose — text, faces, logo edges — stays within it. When the blade drifts inward, it eats empty margin instead of clipping a letter.
Bleed and safe zone together give the cut a 6 mm tolerance band. Designs that ignore them look fine on screen and fail on the plotter.
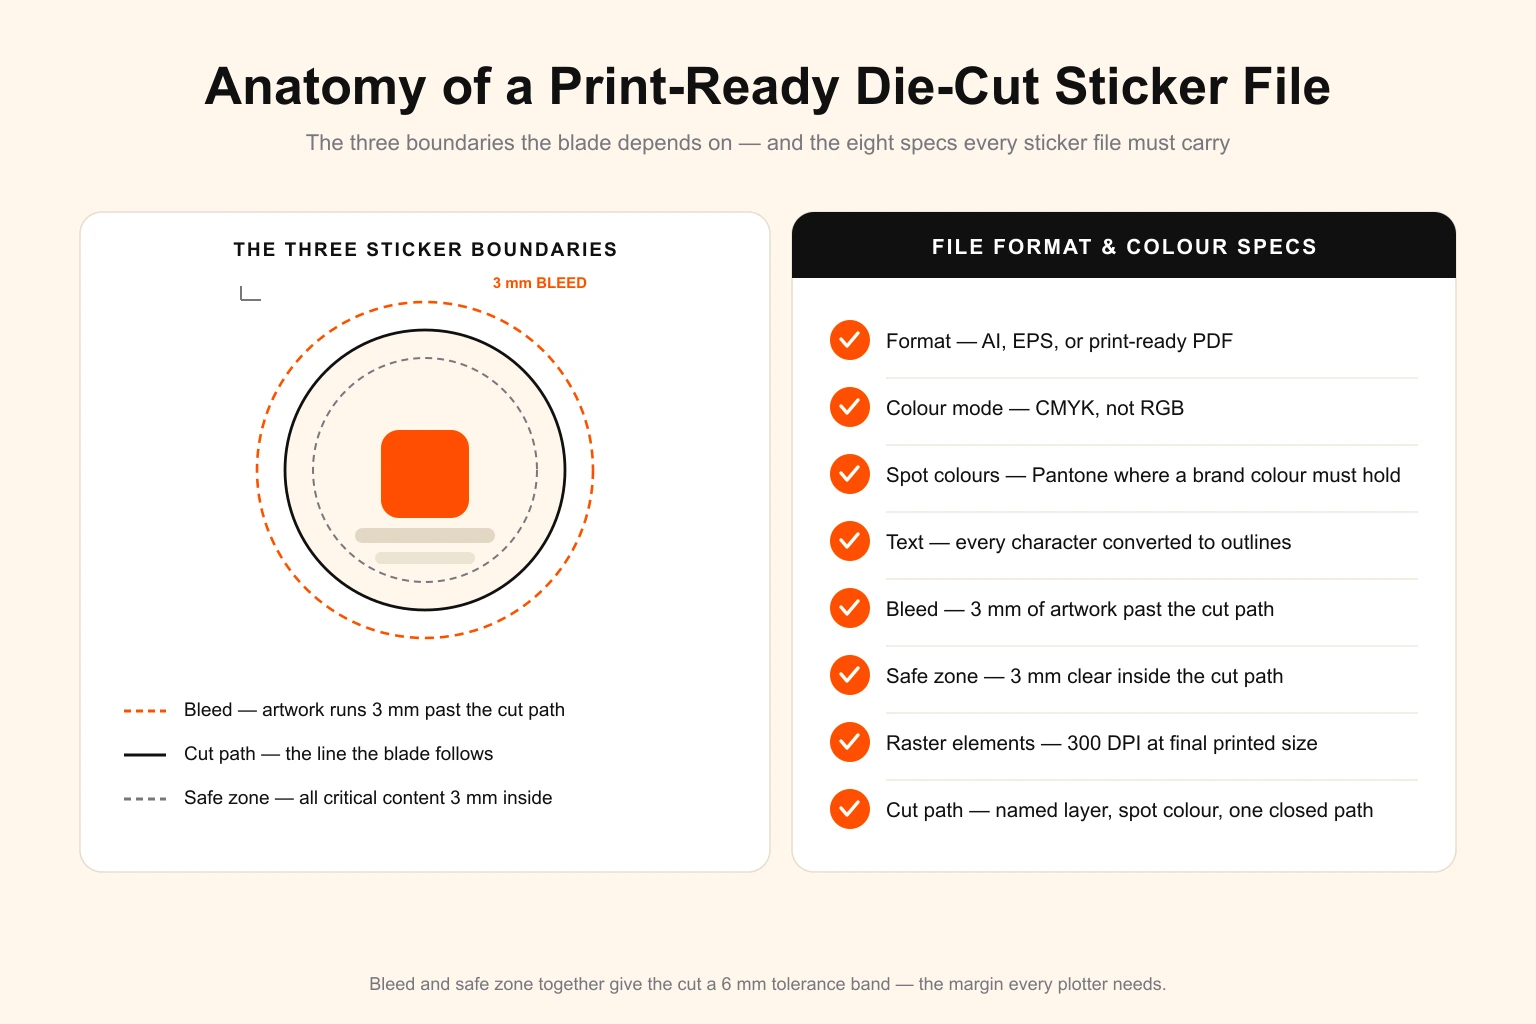
File Format and Colour Specs
| Spec | Requirement | Why it matters |
|---|---|---|
| Format | AI, EPS, or print-ready PDF | Carries an editable, separable cut path |
| Colour mode | CMYK | Sticker printers print process colour; RGB shifts on conversion |
| Spot colours | Pantone callouts where a brand colour must hold | Process CMYK cannot reliably hit every brand colour |
| Text | Converted to outlines | The printer will not have your fonts installed |
| Bleed | 3 mm past the cut path | Absorbs outward blade drift |
| Safe zone | 3 mm inside the cut path | Absorbs inward blade drift |
| Raster elements | 300 DPI minimum at final size | Anything lower pixelates once printed |
| Cut path | Named layer, spot colour, stroke only, one closed path | The plotter reads it directly |
Two specs trip people up most often. Colour mode: design in RGB and the bright screen colours dull on conversion to CMYK — convert and proof early so there are no surprises. Outlined text: a live font that the printer does not own will substitute or drop, silently rewriting the sticker. Outline every character before sending.
Die-Cut vs. Kiss-Cut: What Changes in the File
Die-cut and kiss-cut are often discussed together, but the file differs.
Die-cut cuts through vinyl and backing. The sticker peels off as a single shaped piece. The file needs one cut path around the artwork.
Kiss-cut cuts only the vinyl, leaving the backing paper intact — the sticker sits on a larger backing card, easy to peel, common for sticker sheets and packaging. The file needs two paths: the cut path around the artwork and a second outline marking the backing card boundary (usually a rounded rectangle). Without that second path the printer does not know how big the backing should be or where to trim it.
If you sell both, label the paths unambiguously — CutContour for the vinyl cut, Backing or KissCut for the card edge — so there is no question which line does what. Sticker sheets add a third consideration: the spacing and arrangement of multiple kiss-cut stickers on one shared backing, which should be set in the file, not left to the printer. The broader die-cut versus kiss-cut decision for a product line is covered in our sticker business design guide.

The Pre-Send Checklist
Before any die-cut sticker file leaves for the printer, confirm:
- File is vector — AI, EPS, or print-ready PDF
- Artwork built at final printed size
- Cut path on its own named layer, spot colour, stroke only
- Cut path is one clean closed path with no stray points
- 3 mm bleed past the cut path on all sides
- 3 mm safe zone — all critical content inside it
- Colour mode is CMYK; Pantone callouts where needed
- All text converted to outlines
- Any raster element is 300 DPI at final size
- For kiss-cut: second path for the backing boundary
- Linked images embedded, not left as external links
A file that clears every box runs without an email thread. A file that misses two or three is the reason a sticker order slips.
Who Should Outsource Die-Cut Sticker Design?
Building one die-cut file correctly is learnable. Building forty a month — new shapes, new sizes, seasonal ranges, customer rush jobs — while also running production, buying material, and handling orders is where it breaks down. The spec work is not hard, but it is relentless and unforgiving: one missed cut path and the whole job stops.
A flat-fee design subscription fits this pattern well because sticker work is recurring and varied. Instead of hiring an in-house designer — roughly $50,000–$65,000 a year in the US before software and idle time — or paying a freelancer per file and re-explaining your cut-path conventions every time, you get a standing design resource that already knows the spec. The same logic applies across the print trade; print shops handling sticker work for their own clients can see the reseller view in our guide to unlimited graphic design for print shops, and businesses weighing the cost against bigger competitors can compare options in our Design Pickle alternatives breakdown.
Frequently Asked Questions
What file format do I need for die-cut stickers?
Die-cut sticker printing needs a vector file in AI, EPS, or print-ready PDF. The file should hold the artwork and a separate cut path on its own named layer, plus bleed past the cut line, all text converted to outlines, and CMYK colour mode. Flat raster files like JPG or PNG are usually rejected because they have no editable cut path and pixelate when scaled.
How much bleed does a die-cut sticker need?
Standard bleed for a die-cut sticker is 3 mm — about 1/8 inch — of artwork extending past the cut line on every side. The safe zone sits 3 mm inside the cut line, and all important content stays within it. Bleed and safe zone together absorb the small blade drift that happens on every cutting run, so the sticker still looks clean if the cut shifts slightly.
What is a cut path on a sticker file?
A cut path — also called a cut line or dieline — is a vector outline that tells the cutting machine where to slice the sticker. It sits on its own layer, is usually drawn as a single closed stroke in a clearly named spot colour such as CutContour, and carries no fill. The printer loads this path into the plotter, so it must be one clean shape, not a stack of overlapping lines.
What is the difference between die-cut and kiss-cut in the design file?
Die-cut slices through the vinyl and the backing paper, so the sticker is shaped to your cut path with no border. Kiss-cut slices only the vinyl and leaves the backing intact, so the design needs two paths — the cut path around the artwork and a second outline marking the backing rectangle. Both need bleed, but kiss-cut also needs the backing boundary defined so the printer knows where the card ends.
What resolution should die-cut sticker artwork be?
Vector artwork is resolution-independent and scales to any sticker size with no quality loss, which is why printers prefer it. If the design must include a raster element such as a photo or texture, that element should be at least 300 DPI at the final printed size. Anything below 300 DPI risks visible pixelation once the sticker is printed and cut.
Can an unlimited graphic design service create die-cut sticker files?
Yes. Sticker work is recurring and varied — new shapes, sizes and seasonal designs every month — which fits a flat-fee subscription well. A design service builds the cut path, bleed and safe zone correctly, delivers vector source files, and handles the volume with no per-file charge. DigitalPolo's Partner plan at $399/month covers unlimited sticker design tasks with 48-hour turnaround and unlimited revisions.
Does DigitalPolo deliver print-ready die-cut sticker files?
Yes. DigitalPolo delivers vector source files (AI, EPS, PDF) with a separate, clearly named cut path layer, 3 mm bleed, a defined safe zone, outlined text and CMYK colour mode. Files ship in the formats accepted by major sticker printers — including Sticker Mule, StickerGiant and local print shops — so the artwork runs without being sent back.
DigitalPolo Plans and Pricing
| Plan | Price | Turnaround | Delivery | Best For |
|---|---|---|---|---|
| Partner | $399/month | 48 hours | Unlimited tasks, all source files | Small businesses, startups, sticker and print shops |
| Soulmate | $899/month | 24 hours (priority) | Dedicated team, 24×7 support, all source files | Agencies, high-volume printers, resellers |
Both plans include delivery of all source files — vector formats (AI, EPS, PDF) suitable for print production, including sticker printing, vehicle wraps, signage, and promotional product manufacturing.

Bottom Line
A die-cut sticker is only as good as the file behind it. The artwork has to be vector, the cut path has to be a single clean closed shape on its own named spot-colour layer, bleed has to extend 3 mm past the cut, and the safe zone has to hold every critical element 3 mm inside it. Get those four right, set CMYK colour, outline the text, and the printer runs the job without a single email.
If sticker design is a steady part of your business rather than a one-off, a flat-fee subscription removes the bottleneck entirely — print-ready files built to spec, every time, with no per-file charge and no hiring.
Need Print-Ready Design Files Without the Hiring Hassle?
DigitalPolo delivers vector source files (AI, EPS, PDF) with every task — cut path, bleed and safe zone built correctly, ready for sticker printing, vehicle wraps, signage, and promotional product production. Partner plan from $399/month. 48-hour turnaround.